
Details – Gentleman’s Brougham Project
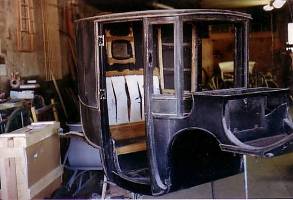
What I’d like to high light with this vehicle is the amount of detail a vehicle can require in regards to cleanup, painting and striping. This Brougham was in good shape structurally, aside from some body panel cracks and minor repairs, but needed stripping down, new finishing and trimmed out. This sounds like a relatively straight forward job, right? From all appearances, this vehicle seemed to be in original condition, but during the disassembly and stripping it became apparent that though the interior was original, there were three finishes and stripe patterns on the undercarriage. Getting the original stripe uncovered became the challenge.

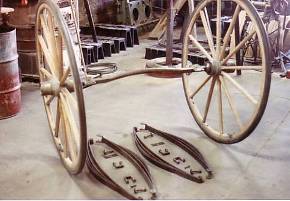
The complete vehicle had the normal dirt and grime from years of use and barn style storage, and the fifth wheel had been greased instead of oiled and was doing its share of adding to the mess.
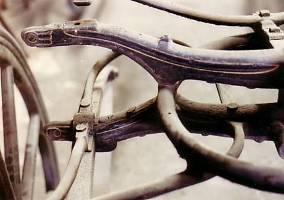
During the disassembly I like to photograph as much detail as possible. Since I often work on multiple vehicles at a time over a number of months (or years), it is a helpful reminder when reassembly time arrives.

Any stripe patterns that are visible are photographed even though they may not end up being the original strip on the vehicle. Pictures at various angles are real helpful when it comes time to reapplying the finishes.

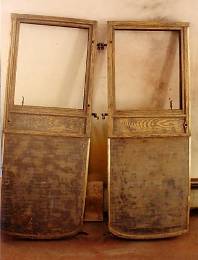
Pictures of the body at different angles during the dismantling process are also helpful, both inside and out.

![]()
During this cleanup period, different repairs will be needed before the actual refinishing can start, like this carved curl that was missing on the lower right side by the door frame.
After the photographing and disassembling, the usual stripping and sandblasting has to be done. Again, everything is cleaned and inspected, down to every last nut and bolt.
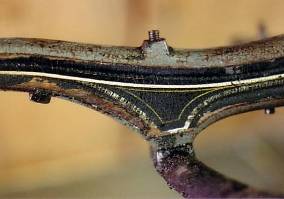
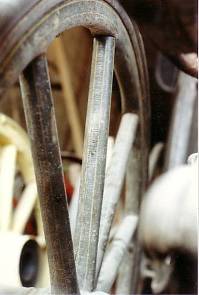
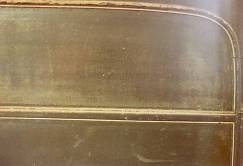
This photo shows the three layers of stripe patterns found on this undercarriage; the brightest top line was the newest, the faded lower broad line was the second, and the finer yellowier line was the original stripe on this Brougham. Finding this fine line stripe throughout the undercarriage took a lot of time, because it was would have been easy to strip right through it and miss it.

Once everything is photographed and documented, the refinishing process begins. Since this vehicle has such broad panels and will be painted in black and Brewster green, the priming process is when all the little imperfections must be worked out or they will stand out like a sore thumb when finished. This in itself becomes a time consuming process and requires much attention to details. The quality of the paint job revolves around the attention given during this procedure.
Since this body will be two-toned, black and green, the painting process has to be multi-stepped. The areas taped off are the green panels while the remaining sections are black. By the time we are to this phase all the sanding is done with a minimum of 400 grit sandpaper.
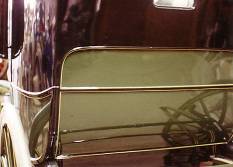
The photo to the left shows the rear body panel as originally striped while the photo at the right shows the finished two-tone panels and the fine yellow stripe applied to the panel edges. You can tell by the reflections why attention to detail is so important.

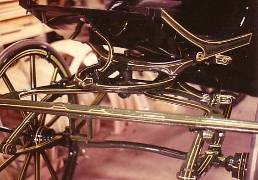
The picture at the left shows the fifth wheel assembly painted and striped, but you will notice an almost dull blackish sheen. This is because the entire finish has now been sanded with 600 grit sandpaper after the stripe has been applied. Why? This allows proper adhesion of a clear coat to be applied over the entire finish; paint and stripe both. Doing this to the entire vehicle is a painstaking task!


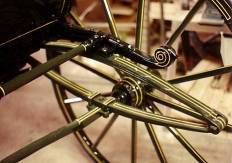
This shows the same process being done to the wheels. The left picture shows the wheel painted, striped, and sanded with 600 grit paper while the right photo shows the wheel with the clear coat applied. This approach is quite costly, due to the time involved, but is quite dramatic in its effect.


This was the monogram on each door.

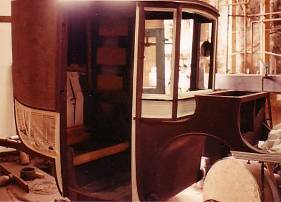
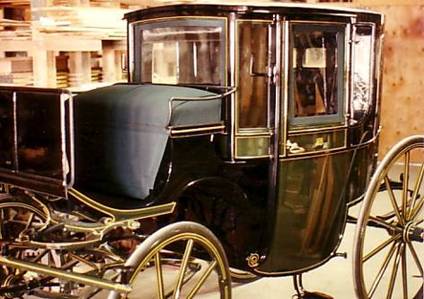
These photos show a few before and after shots.

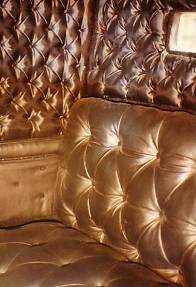
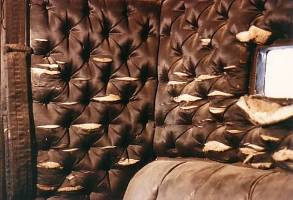
These are some before and after photos of the interior also; leather seats and black satin interior panels and headliner.
The detailing in finishing this Brougham was indeed time-consuming, but the results were rewarding. Thanks to the King Family and their sponsoring the restoration of this Gentleman’s Brougham! If you’re ever in Sheridan WY, look them up.
